
In this article, I’ll share tips to optimise your practice space for the best possible experience. Choosing the right online piano lesson setup is essential. It ensures we get the most out of our time together using Zoom videoconferencing software.
This article is for students. I will start from the simplest possible setup and progressively build up toward more elaborate and effective solutions.
Piano + Smartphone
Pros: Readily available and the easiest setup of all.
Cons: Small screen and speaker size mean this is not a viable long-term solution.
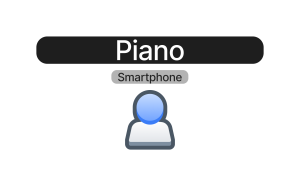
This is the simplest setup. It assumes you have a piano and a smartphone. A mobile phone works fine for an emergency. For example, if you cannot attend in-person classes for one week, this is a good temporary option. However, the main issue is the small screen. This makes it difficult for you to see exactly what your teacher is doing.
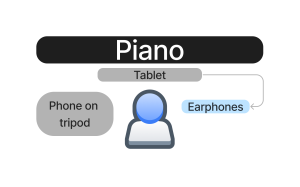
Piano + Tablet
Pros: Most households own a tablet. It offers a good screen size.
Cons: Built-in speakers are not great for music. Use earphones.
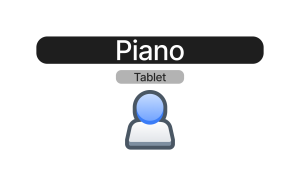
A tablet provides a much better experience. You now have a screen of a decent size to see instructions clearly. Consequently, you can maintain proper posture while following the lesson. A tablet is a great middle-ground for an online piano lesson setup, offering a clear view while remaining portable.
Use earphones
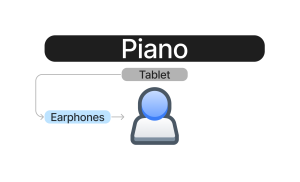
Using a pair of earphones or a headset is much better than using built-in speakers. This one small addition provides a dramatic improvement to the whole experience.
Use a tripod or stand
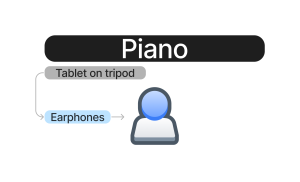
Most students place their tablet on the music stand. However, this presents a problem. If the tablet is on the music stand, I can only see your face. It becomes impossible to check your technique, wrists, or posture. Therefore, using a tripod or tablet stand helps greatly.
When it is time to check your work, place the tablet on the stand to your side. This gives me a clear view of the piano and your upper body. I can then spot and address any technical issues immediately.
For single-device setups, I recommend a “half and half” strategy. In the first half, place the tablet on a tripod so I can see your work. In the second half, move it to the music stand to follow my feedback. This simple change saves valuable lesson time.
Piano + Tablet + Smartphone
Pros: Provides an optimal view for the teacher. Equipment is available in most households.
Cons: Accessing the Zoom meeting with an extra device takes a few extra minutes.
Using two devices is the “sweet spot” for online piano lessons. You can keep the tablet on the music stand to follow my instructions clearly. Meanwhile, your smartphone acts as a dedicated webcam on a tripod. This allows me to monitor your technique without you having to move your main screen.
Note: Remember to mute the microphone on one device to avoid feedback. I usually recommend muting the smartphone.
Piano + Laptop
Pros: Laptops offer greater flexibility and large screens.
Cons: Laptops are bulky and difficult to place on an upright piano.
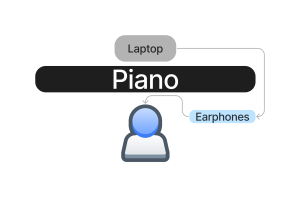
A laptop provides a significant upgrade in screen size. However, positioning can be tricky. Since it won’t fit on a standard upright music stand, you may need to place it on top of the piano. If you have a grand piano, you can simply remove the music stand and place the laptop directly on the frame.
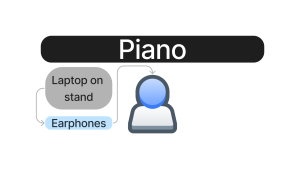
If you use a laptop as your primary device, a stand is essential. This allows you to position the camera at the correct angle for technical feedback. If a smartphone is also available, connect it as a second camera. This creates a professional-grade online piano lesson setup.
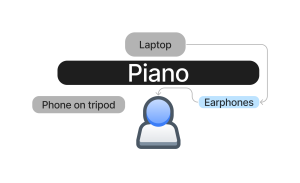
This configuration is the ultimate goal. You can see and hear my directions clearly. At the same time, I have a full view of your poise and fingering.

Adding an external webcam is another excellent improvement. It allows me to see your upper body while you focus on the laptop screen. This creates a more dynamic and interactive lesson experience.
Improving your online piano lesson setup
More tweaks can be applied to further enhance your experience.
USB microphone

A USB microphone makes a massive difference in sound quality. Built-in microphones are often inadequate for music. An external mic allows me to hear the nuances of your playing much better. Fortunately, most USB microphones are inexpensive and simple to set up.
Audio interface

An audio interface is professional-grade equipment. It requires some technical knowledge to set up correctly. If you own a digital piano, you can route the sound directly into the interface. This results in perfect clarity for the teacher. While this setup is more advanced, the audio benefits are immense.
Once your tech is ready, the next step is tracking your progress. I highly recommend using a piano practice diary to stay organized between our live sessions.
With a little planning, your online piano lesson setup can become a springboard for mastery. Get creative, have fun setting up your space, and get ready to take your piano skills to the next level!